5 Easy Ways to Introduce Scissor Skills For Toddlers
Affiliate and Referral links are used below to promote products I love and recommend. I receive a commission on any purchases made through these links. Please see my disclosure policy for more details. As an Amazon Associate, I earn from qualifying purchases.
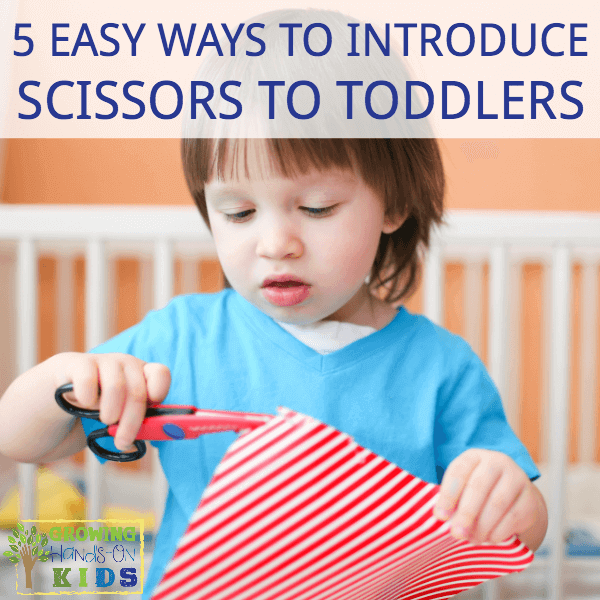
My daughter, who is almost 3, has been showing an increasing interest in using scissors lately. Most of this is due to her seeing me use them to cut tags off baby clothes as we get ready for baby no. 2 to come. But developmentally, she is also at the age when children start to develop scissor skills as part of their fine motor development. Yes, that's right, 2-year-olds should be able to start using scissors to makes snips on paper.
Most parents are anxious about teaching their kids how to use scissors. However, I believe that showing your child how to appropriately use scissors and giving them supervised practice will help them to develop not only good fine motor and visual-motor skills but an appreciation for how to use tools appropriately.
First, you need to have some safe toddler scissors or tools to use.
You can check out some of my recommended scissor tools over at my Amazon storefront HERE.
5 Easy Ways to Introduce Scissor Skills for Toddlers
1. Cutting Play Dough
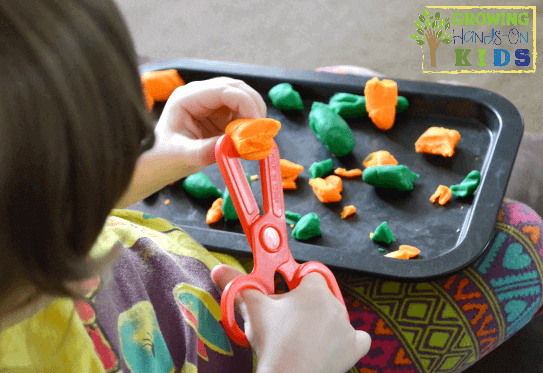
For this, we just used regular Play Doh® and rolled pieces of it into longer lines or “worms.” She enjoyed helping me with this part as well, which is a great fine motor activity in itself.
Then I took a “worm” and demonstrated by using the playdough scissors to cut off little chunks. We had the Play Doh® on a small metal work tray and she sat on the couch this particular time, but she has also done this at her child's table and chair work area.
She worked at this for probably about 45 minutes, really good concentration for her age, which shows she is ready to learn this skill!
2. Cutting Modeling Clay
After trying play dough, which is a little bit softer, I would move on to modeling clay. We have tried this before as well and it is a little bit harder to cut through than regular play dough. So it's a great next step for little hands to work on strengthening those muscles.
You may also need to use regular safety scissors with this instead of the playdough scissors.
3. Cutting Foam Sheets
Moving from modeling clay to foam sheets will help to simulate cutting paper. The thickness of the foam sheets still gives them some resistance so the scissors don't move too fast and they can practice perfecting their accuracy and grip on the scissors. This also helps to practice holding an actual piece of paper, which is a good bilateral coordination skill to have.
You can also try marking the foam sheets with a very thick straight line to begin practice cutting on a line, just not free for all cutting.
4. Cutting Yarn
Cutting yarn can also double as a nice sensory bin base when they are done snipping it.
This is probably going to be the more challenging of all the options because the yarn is smaller to cut. However, it gives some great visual motor skill practice. Just cut some long strands ahead of time and let them practice cutting them into smaller pieces.
5. Cutting Construction Paper or Stock Paper
Cutting construction paper or stock paper again gives the paper a little more thickness so toddlers who are beginning to cut have an easier time handling it. You can draw lines or shapes on it and allow them to practice cutting on the lines and shapes. Just remember that developmentally, they won't really be able to follow the cutting lines until preschool (ages 3-4). But it is still good practice!
If you want to learn more about scissor skill development, get expert advice in The Scissor Skills Book, written by 10 pediatric Occupational and Physical Therapists.
You can also follow my Scissor Skills Pinterest board for more ideas.
Have you tried letting your toddlers use scissors yet? Let me know in the comments!
You May Also Like:

Heather Greutman, COTA
Heather Greutman is a Certified Occupational Therapy Assistant with experience in school-based OT services for preschool through high school. She uses her background to share child development tips, tools, and strategies for parents, educators, and therapists. She is the author of many ebooks including The Basics of Fine Motor Skills, and Basics of Pre-Writing Skills, and co-author of Sensory Processing Explained: A Handbook for Parents and Educators.


Please note, there truly is a difference between left and right handed scissors. The thumb blade should always be on the opposite side from your thumb, finger blade closest to your hand. Proper scissoring requires a squeezing action, not possible if the thumb blade is on the same side as the thumb. What your lefty will wind up doing is pushing out with the thumb blade, not an easy task. Try this yourself using a right handed scissor in your left hand and try to cut a piece of paper. Push the blade out with your thumb as you bring the blades closed and you’ll see what I mean.
If your lefty child grows up using right handed scissors, they will not be able to use lefty scissors – their muscle memory will be too strong and even the best left handed scissor will be useless to them. Using scissors marked as ‘left or right’ means your giving your lefty right handed scissors that don’t have handle molding on them to make it hard to hold in the left hand – they are still right handed scissors.
On craft foam – this is a non-recyclable material. I’ve tried to eliminate it in my classroom for this purpose. If you have foam from packaging, great to use, but please don’t buy foam just to cut into little bits, those bits last your lifetime and your child’s lifetime and more . . . .
I am a teacher in toddlers room and I can apply all the ideas an activities.
Thanks so much?
We use index cards (large, small, lined, plain) and the safety scissors from Lakeshore Learning. I’ve done it for years and it works great as an introduction to cutting paper. We also use paper punches.
Great ideas!
In my daycare I have the kids cut play dough but never thought about foam sheets or clay. Thanks for the ideas, we will be adding to our busy box shelf.
This is great! My 2 year old just expressed a desire to use the scissors last week. I never thought to use play-doh or clay! Thanks so much 🙂
Awesome! Have fun! 🙂
I have worked with 2 and 3 for yrs. I have found if your give them scissors when with them, they will be cutting well by 2 1/2 yrs. I gave my kid scissors at 23 months. also got a book from Barnes and Noble. cutting practice for 234 yr olds. by 2 1/2 she was cutting them by herself, me watching of course, and they were almost perfect of the line. also had her cut construction paper right away too. now we do card stock. harder to cut on line around curved edges. but she gets better all the time with the harder stock. she is just 3 now. the scissors I got were the kick back simmer to ones pieced. she used those a whole 2 weeks. I also got 3 yr old scissors. I wouldn’t bother now with the kick back ones.